
It’s not exactly a secret that in today’s world we are losing touch with a lot
Often times, we’d rather pay for someone else to do something we could do very easily.
This isn’t always a bad thing as it has provided opportunity for others to form businesses from it and follow that “American Dream”.
However, it’s also not a secret that its hard to find good honest workers willing to do a quality job. Especially in the world of oil changes.
I can’t tell you the number of stories, both personal and from others, about getting ripped off or tricked at oil change companies.
Believe it or not, changing my own oil was the first step I took through the door of doing my own vehicle work and modifications. It’s such an easy thing to that can save you money and can help you get familiar with your car.
Check out the 9 steps below on how to change your own oil and start learning and saving money now!
Determine What Oil/How Much and Filter You Need
Like any good project you set out to do, the first you thing you should always do is figure out what you need and how much of it.
Here’s what you will need for your oil change:
- Proper quantity (quarts) and grade (SAE number) of oil
- Oil filter
- Oil pan for catching old oil
- Possibly an oil filter wrench
- Paper/Shop towels for clean up
After doing this once, next time you go to change your oil, you can skip this step because you’ll already know.
The average engine in a vehicle requires between 5-8 quarts of oil. Most the vehicles I have worked on are usually 5.5 – 6 quarts.
The annoying thing about this quantity is you can usually only find 5-quart containers and 1-quart containers. So chances are you won’t get away with needing to just buy one thing of oil because you’ll need that extra 0.5 quarts.
To find out how much oil you will need check your owners manual for factory specified quantities.
As a quick reference, you can generally follow these guidelines for knowing how much oil you will need:
- 4-cylinder engines usually need about 5 quarts of oil
- 6-cylinder engines need around 6 quarts of oil
- 8-cylinder engines need between 5-8 depending on the size of the engine block
Engine oils come in different weights and viscosities. Thats what you see on the front of the jug written like “10W-30” or other variations.
Your owner’s manual will tell you exactly what SAE grade of oil your engine needs. It is important you follow what the factory specifies for
To understand what these values actually mean and how they affect your engine, check out the video below.
After choosing your oil quantity and grade, you need to determine whether you want to use synthetic or conventional oil.
Ultimately, synthetic oil is manufactured to have fewer impurities and be better on your engine. You can usually go longer intervals between oil changes with synthetic oil but it does cost more.
Depending on the age of your engine sometimes it genuinely doesn’t matter whether you run conventional or synthetic. You’ll find that everyone has an opinion and it can open a big can of worms.
The choice is up to you, but do some quick research and decide what’s best for your situation. It is important to be consistent with what you use. If you start using synthetic, don’t swap back and forth every oil change to conventional and then back.
Lastly, before starting your oil change, pick up an oil filter, oil filter wrench (if you can’t loosen it with your hands), and an oil pan.
Most auto stores, including WalMart, will be able to point you to the right oil filter or have a catalog that will tell you acceptable ones.
There is lots of chatter and talk on which oil filters are best and we encourage you to do your research. For our Jeeps we like to use Mopar if we can and keep things as factory as possible.
Oil Additives…
The truth about oil additives is a hard topic. Over the years, I have added oil additives occasionally because I wanted to ensure that I was doing all I could to maintain my older engine.
I don’t consider myself “naive” and therefore was able to realize that the performance promises on the bottles were likely a load of bull. However, I thought that maybe they could at least provide some level of protection.
The truth is, this topic is very divisive in the automotive world. Some people swear that they have prolonged engine life by using things like Lucas or Seafoam and others will adamantly insist that all additives are a waste of money.
While we can’t specifically prove one case over the other, what we can strongly stand behind is this: nothing will ensure your engine lasts as long as possibly as regular routine maintenance and oil changes.
Make sure you are faithfully following your manufacturers maintenance schedule, use a quality oil (finding the extra money for Royal Purple wouldn’t hurt), and you can guarantee that you are doing the best possible.
Anything beyond that is up to you and what you find works best. If you truly can prove some additives work, go for it. If you want to save money and just change the oil, that’s fine also.
Whatever your choice, do your research and don’t fall for all the promises and gimmicks you see.
Locate All the Involved Pieces
In order to change your own oil, you’ll need to locate the key components.
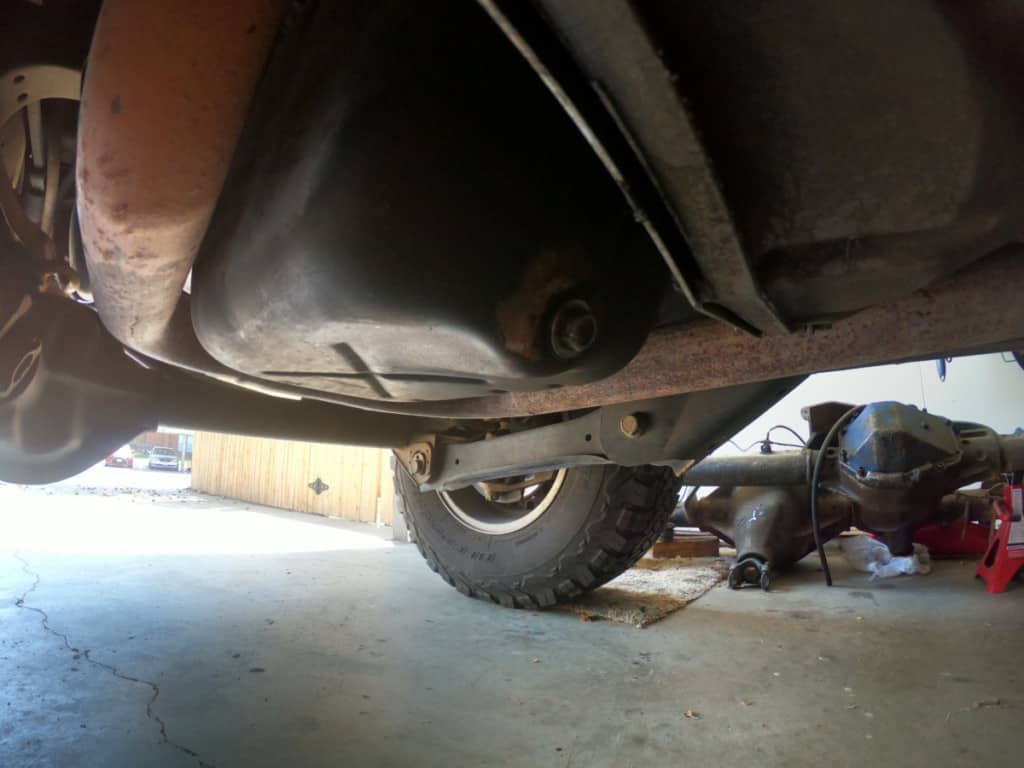
First, check under your car and locate the oil pan drain plug. If you have under the body skid plates, you might have to remove one to find it. Your oil pan and plug should look something like the one below.
After finding your plug, you’ll need to verify what size socket you will need to remove it have that ready to go.
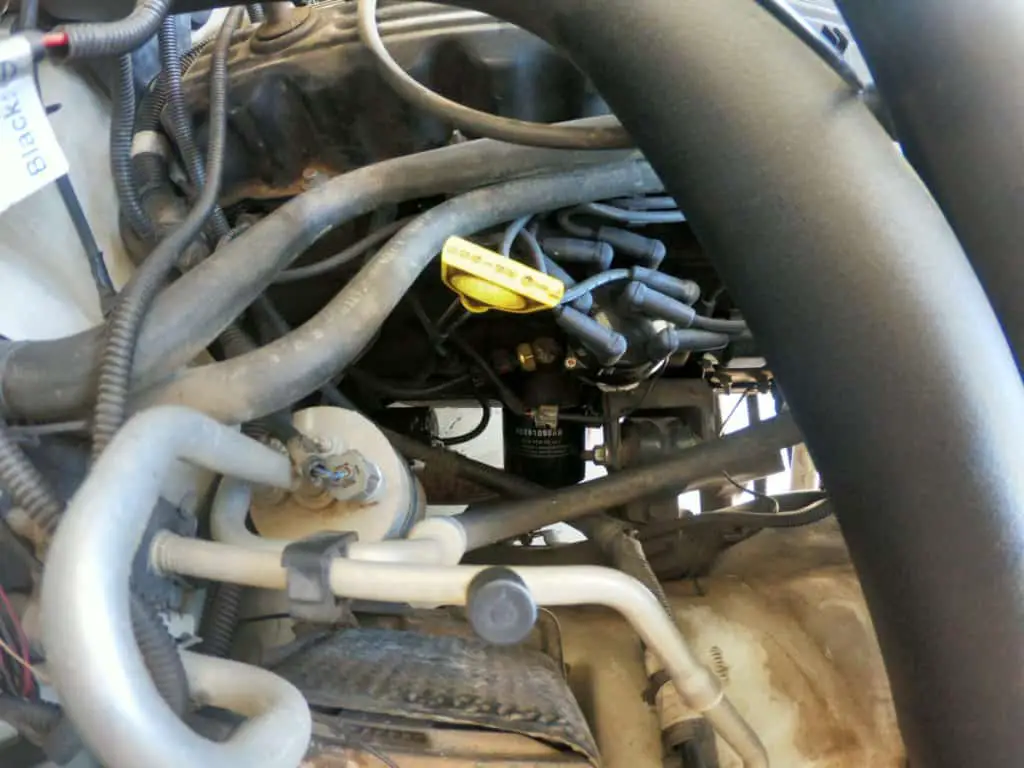
Next up, locate your oil filter. In the case of this 1999 Jeep Wrangler TJ, the filter can be found on the left side of the engine block when facing the engine block. In the picture below, the oil filter is the black
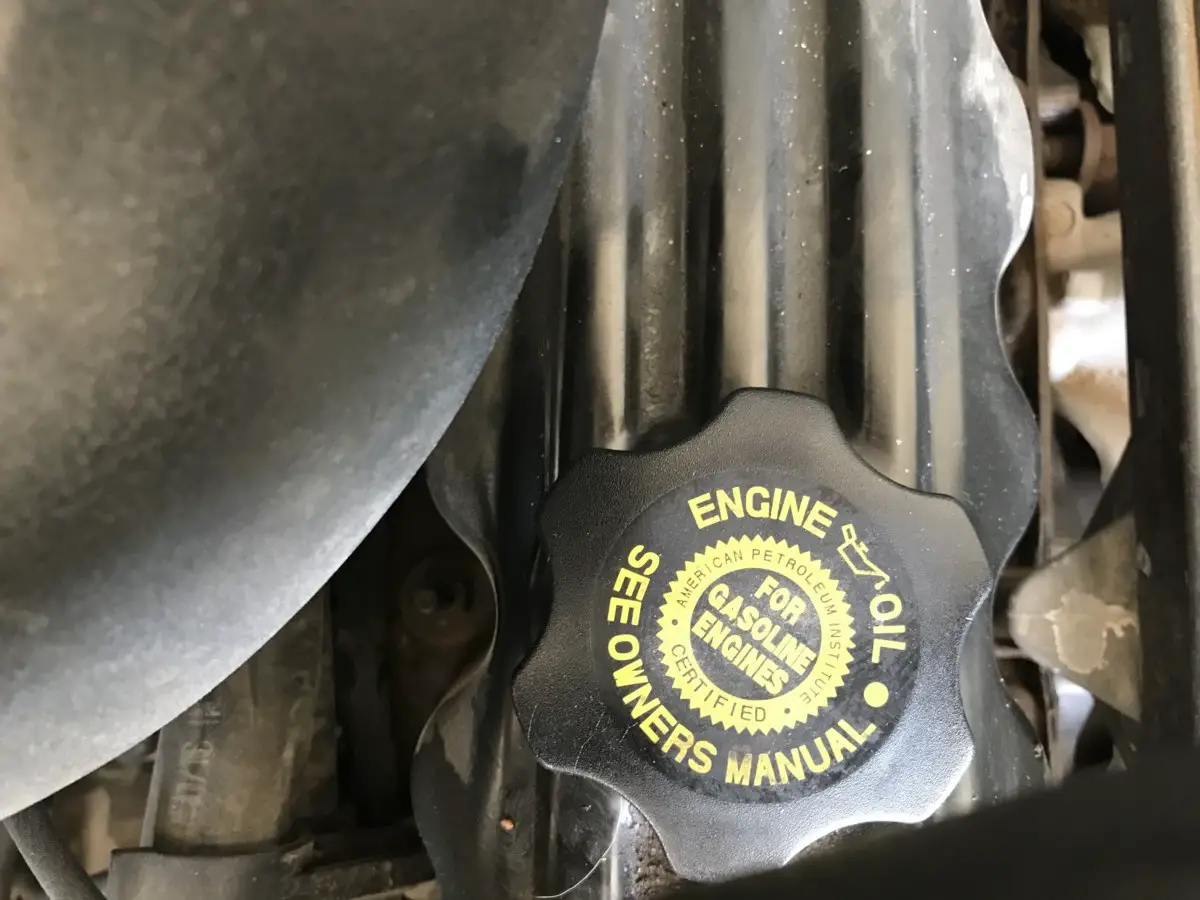
While pretty obvious in most cases, the last thing to do is to locate your oil fill cap. This can be found on the top of your engine block and will look something like the one below.
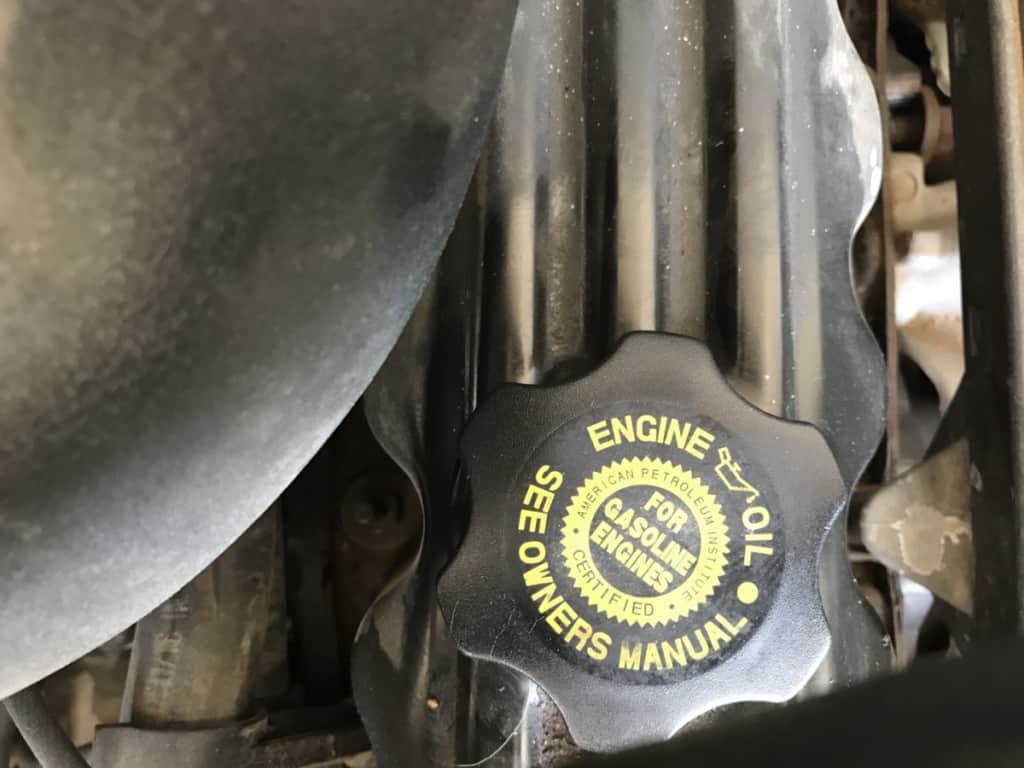
That’s it, you’re good to go to the next step!
Run Your Car for Ten Minutes
After you have your car parked in the place where you’ll be doing your oil change, it’s a good idea to start it up and let it run about ten or so minutes.
Make sure you put your emergency brake on and if you are on a significant incline you should chock your wheels with some wheel blocks.
The reason we like to run our car is to heat up the oil. Like you learned in the video about oil grades, your engine oil runs at different rates when it is cold and when it is hot.
By allowing the engine to heat up the oil right before we drain it, we allow the oil to drain quicker and easier because of its temperature. Parking on an incline can also help ensure you get all the oil flowing to the oil plug.
While your car is running, this gives you time to get your things in order. Get the proper size socket out to remove your drain plug, open up your hood, and make sure your oil pan is under your drain plug.
Placing some cardboard or a tarp underneath your oil pan can help ensure you keep the pavement clean where you are working.
It’s always a good idea to have some shop rags or automotive paper towels ready to go to clean any drips or splashes. Keeping the area clean is responsible and helps eliminate staining things with oil.
Drain the Old Oil
After the engine has had a chance to warm up, it’s time to drain the old oil out of the car.
Carefully get under the vehicle and slide the oil pan and any cardboard/tarps/whatever you choose to use under the drain plug.
Throughout the process of changing your oil, it is a smart idea to wear some sort of latex glove. A smart choice would be to find one that has some thermal protection.
REMEMBER: the oil draining out of your car is hot!!
Carefully, use your socket to loosen the oil drain plug bolt to a point where you can easily loosen it with your fingers.
Set your socket aside and as your pressing firmly against the bolt loosen it till you can tell all the threads have been undone. The reason for pushing on the bolt firmly is to ensure that it doesn’t just fall out and spill oil all over you.
Once you are ready, pull the bolt out and swiftly remove it from the stream of hot oil and allow the oil to drain.
The majority of your oil will drain out rather quickly. However, to ensure we get as much out as possible, allow the oil to drain for 5-10 minutes before re-inserting the drain bolt.
Before you put the bolt in, wipe it off and clean and old residue off. Insert the plug and finger tighten it till you can’t. Take your socket and tighten the bolt firmly.
The specific torque to which the bolt should be tightened is relative to your vehicle.
However, a good rule of thumb is after tightening with your hand, use your socket to make sure the bolt is flush with the oil pan surface. After that, turn 1/4 of a turn and you’re done.
You want the bolt to be snug but you don’t want to
Remove Old Oil Filter
After draining the oil out of your oil pan and securing the drain plug, it’s time to remove your old oil filter.
Wherever you located your oil filter to be, make sure to position your oil catch pan underneath.
When removing and installing new oil filters, it is possible to spill oil or have some drip from the location it connects to.
Try to remove the oil filter by unscrewing it like a lightbulb with your hands. Oil filters should always only be installed hand tight.
If you can’t unscrew it with your hand, feel free to use the oil filter wrench you bought. Most are pretty straightforward and usually just help us get a better grip on the filter.
Once the filter is loose (whether by hand or wrench), simply unscrew it and remove it similar to your drain plug. Be aware that old oil could still drip out and could be hot.
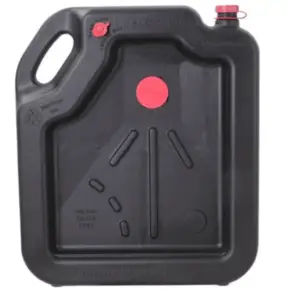
If you got an oil pan like the one below, there are usually spots to place your old filter and let it drain and cool down.
Similar to the oil draining part, allow your oil filter and where it screws on to drain for about 5 minutes while you get everything ready to put back together.
Prepare Oil Filter and Put on New One
This next step is one that is often overlooked and it’s easy too. Before you put the new oil filter in, there are a key couple steps you need to take to get it ready.
These steps aren’t complicated at all but they are essential.
First thing first, take out your new oil filter and the 1-quart oil you probably had to buy. Pour new oil into the center of the filter about 3/4s full.
This is called priming the oil filter and it is an important step often overlooked. By doing this, you are ensuring that oil is ready to go instead of waiting for it to cycle through the system.
Will you be fine if you don’t prime the filter? Probably, but why take the risk.
If your filter mounts directly on top or on the side, it can be tricky to attach without making a mess. You should get the knack of things after a couple times.
Finally, before installing the knew filter, dip your finger tip in the fresh oil and slide it around the rubber O-ring on the filter giving it a nice seal.
This extra step serves as insurance so that you are making a good seal at the connection between your filter and the engine block.
After these couple of steps, you’re ready to go and to install the filter. Simply match it up to its connect point and screw it on till it’s firmly tight.
Do not use the wrench to tighten your filter. Only tighten it as much as you can with your hand and you’ll be good to go.
If your filter mounts in a difficult location like on top or on the side, you’ll need to quickly fit it to
Fill with New Oil
The easiest part of this whole process has arrived.
Once you have your filter on and you’re positive you have your oil drain plug in and tightened, install any skid plates you might have had to take off.
Locate your oil fill cap and remove it. Find a funnel that will fit in the hole and make sure it is secure as you will likely need both of your hands to pour the new oil in.
Slowly pour the 5-quart oil jug into the engine block. Note that depending on the SAE number and viscosity of your oil, it might flow slowly down the funnel so don’t pour it too fast.
After pouring the oil in, don’t forget the oil left over in the 1-quart jug if you had to purchase one. Put that in and secure your oil fill cap.
After everything is back together, turn your car on and allow it to run till it reaches operating temperature. Make sure you are not leaking oil anywhere and that your car is running smoothly.
Clean Up and Proper Disposal
Last but not least, it is important that you dispose of all your old oil and filter properly.
Carefully pour your old oil into the 5-quart jug the new oil came in and clean up any mess.
Look up your local auto store (O’reilly’s, Auto-Zone, Advanced Auto Parts, etc) and they will allow you to dispose of your oil in their oil tank where they will dispose of it correctly.
NEVER pour your oil into the ground or dumpster. Part of changing your own oil is doing it responsibly.
After everything is cleaned up and disposed of, that’s it, you’re done! You’ve changed your own oil and you are one step closer to saving money and learning to do your own work on your car.
Conclusion
At Siberian 4×4 we are all about encouraging people to stay in touch with the skill sets that helped establish this country. Simple things like changing your own oil are small steps to getting your hands dirty and learning about the machine you drive everyday.
No matter your preference, always make sure you are informed and properly prepared for any situation, and always keep the wilderness on YOUR side.